This cute little heart plush is a great DIY Valentine’s day gift and can be customized for whoever you are giving it to.
Supplies: 2 colors of felt, embroidery string, an embroidery needle, stuffing, scissors, and a pen. Optional: scrap paper, embroidery hoop, scent sachet

I can not free hand a heart shape, so I started by folding my piece of scrap paper in half and sketching out half of a heart.
My heart was about 4 inches tall and 5 inches wide.

Cut out the heart from the paper and trace it onto one color of your felt (whatever color you want as the front). I found that a sharpie or pen showed up best.

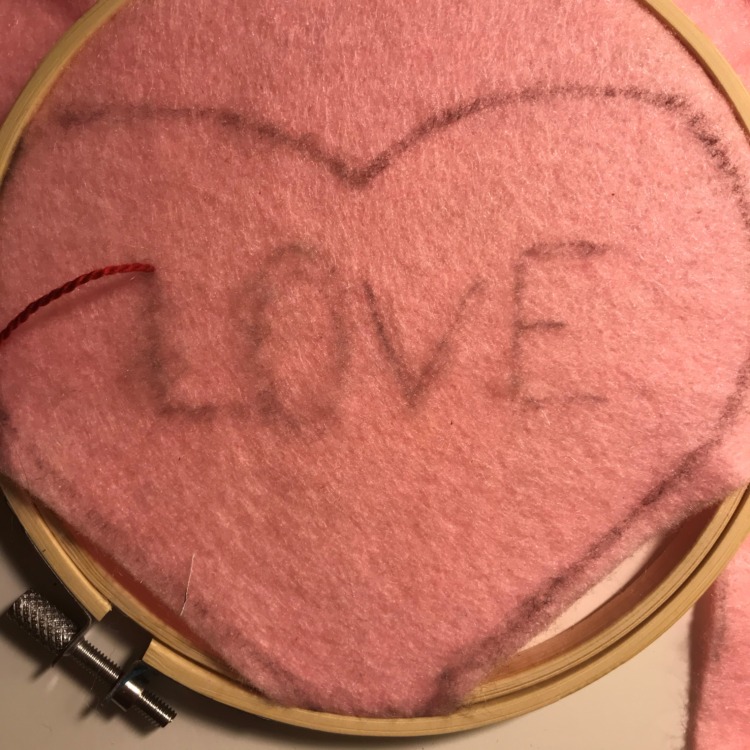
Now write out what you want to embroider. I wrote “LOVE,” but you can do whatever you want (maybe someone’s name).
If you want to use an embroidery hoop now is the time to put your felt on the hoop. This is completely optional, you can definitely do this without a hoop.

Now to get ready to embroider. Cut one length of your string to a little less than your wingspan. Tie a knot at one end of the string and thread the other end through the hole at the top of the needle.
The stitch we are going to do is called the back stitch. I will explain it below but there are many video tutorials online if you need more help.

From the back, poke the needle up through the felt at the end of one of the letters. Pull the thread until the knot is against the back of the felt. Next, a few millimeters away from where the string is coming up, poke the needle through the felt from the front to the back. And pull the thread all the way through. This is the starting stitch.


For the rest of the stiches, poke the needle from the back to the front a few millimeters away from where the last stitch ends. Pull the thread all the way through. Next, poke the needle through the felt (front to back) right next to where the previous stitch ends. Repeat this stitch until you finish the letter.

Complete all the letters like the first one, with the first stitch and then the repeating stitch.

Tie a knot on the back to secure the string.

Cut out the embroidered heart and place it on the other color of felt. Use the embroidered heart to trace a heart onto the other felt. Cut out the second heart.

Now it is time to attach the two sides of the heart. We are going to use the same stitch as before, the backstitch.
Cut another length of string (longer than the previous one). Tie one end of the string and thread the other through the needle.

Poke the needle from the back to the front of the embroidered heart. Pull the yarn all the way through. Do this about 1/4 inch away from the edge. This is to hide the knot.

Place the embroidered heart on top of the other heart. Poke the needle through both felt hearts, a few millimeters away from where the string comes up. Pull the string all the way through.


Through both hearts, poke the needle up a few millimeters away from the previous stitch. Pull the string all the way through. Next, poke the needle through both felt layers next to the previous stitch. Repeat this around most of the heart.

Stitch around the heart, leaving a hole about 2 inches wide.
If you run out of string part of the way around, that’s ok, just cut a new piece of string and continue going around the outside of the heart.

Stuff the heart with filling through the hole you left in the side.

Optional: After stuffing the heart half way, add a scented element. I used these dried pieces of lavender that I found at the craft store. Then continue stuffing the rest of the way.

After finishing stuffing, continue stitching until you close the whole. Use the same stitch as before. When you are done tie a knot at the back.

After tying a knot, poke the needle through only the back layer of felt to hide the end of the string. Mine was very long so I also cut some off.